Our daughter wanted to be a Rose Fairy this year for Halloween. When she described it to me, I knew she had most everything in her costume box to pull this together. I just needed to make some minor adjustments. Although, I could have invested time and money into this costume, I’d rather do free and easy. So, I spent one afternoon making it. Here are the details to making your own Rose Fairy costume.

Materials:
- Leotard
- Tutu
- wings,
- Cheap crown from the Dollar Store
- Half sweater
- 3 sheets green felt
- Lots of red and pink paper (cut into squares)
- 2 sheets of green paper
- Fairy Shoes
- Fairy Wand

For the Roses:
I folded lots and lots of origami roses, which I got inspired from this YouTube video. There are also tutorials on Lotus flowers and daisys. I made several as I went along. I made 6 roses at a time doing 3 steps at a time. It saved time, and now I have it memorized. Using large stitches, I sewed the roses using embroidery floss to the sweater and leotard.
Leaves on Skirt:
Cut each paper and felt sheet in half lengthwise. Iron lengthwise to make the folds in the leaf. After the first fold, keep folding in half and ironing the seams to get the vein look. Fold the leaf in just a half lengthwise again, then cut a scalloped rose leaf pattern along the edges (or other flower of your choice).
Using large stitches, sew the leaves around the tutu, I added some extra roses to the tutu.

The Leaves on the Crown:
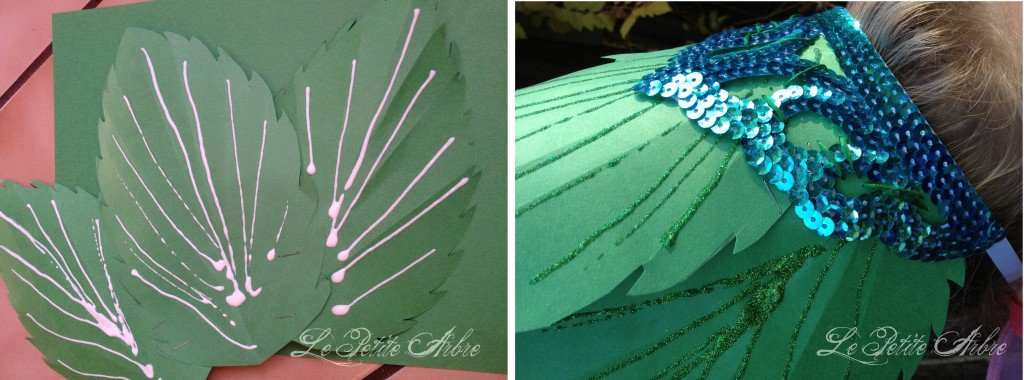
I drew leaf veins with glue onto the leaf paper then sprinkled green glitter over the glue. I then hand stitched the leaves (without damaging the crown I paid a whole $1 for at the craft store) to the crown.


